
So you guys seemed to like my first post on quality lipsticks for less so I thought I'd follow it up with a brand you probably haven't heard of because it's a Brisbane based makeup supply store who started their own line of products. And they are simply AMAZING.
The store and brand is called Makeup & Glow and is the brainchild of one of the best bridal makeup artists I have ever come across, Rachael Parnell. She noticed that there was a huge gap in the market for pro brands to be brought into Australia and made available to professional makeup artists.
So lets talk about the lipsticks. I have ten of them. 5 of the best sellers were provided for review and 5 I bought myself. I can honestly say that the quality of these blow my mind. I'm sure you guys want to know how much these are, and I would still pay for them if they were double or even triple the price. They are $5.95 each. Yes, really. If you don't believe me, go look for yourself.
You get a huge 37mm pan which is about the size of an actual lube of lipstick melted down. I know this because I do it all the time.
So first things first, lets start with the popular shades -

Bride to Be is an amazing dusty deep pink, which not surprisingly is a great bridal colour. I love using this colour for weddings because it's so easy to grab a backup pan and give it to the bride along with a disposable lip brush for touch ups during her big day. Opacity is amazing, it's super smooth, super creamy and really quite moisturising.

Salmon is exactly as it is named. A creamy, opaque salmon colour which is more flattering then you would think. I would call this almost a coral shade, but a lot more wearable for more people.

Tango Pink is a brighter version of Bride to Be. Still really wearable and work appropriate. Again, really creamy and opaque.

Love Heart is one of my favourites because I do love a hot pink lippie. It's a seriously fun colour and I love it.

Mother of the Bride is another really popular colour. It's a plum colour and it looks amazing on mature ladies as well as younger women.

Mulbury looks much deeper in the pan then it actually comes out in real life. This one has an almost glossy finish to it and I love using it to mix in to make a red lipstick a little more vampy without going for a solid purple lip. Also, I may have gotten a little excited and used this colour before I took a photo.

Brick Red is a really great colour. It's a deep, almost tomato red, but deeper. Think Campbell's Tomato Soup, that's what it reminds me of.
Now we are getting to the mixing colours.


White Orchid is creamy and a solid colour but it does require a little more product then the others to build up opacity, but that is to be expected and really, who wants to wear stark white lipstick? I use this to lighten custom mixed lipsticks all the time, making it one of the most used shades in my kit.

Same goes for Little Black Dress. Great mixing colour, needs a little more product for a solid lip coverage but when darkening a lip colour, a little goes a long way.

My absolute favourite of the collection is surprisingly Aztec Gold. I really didn't expect to love this the way I do. It applies like butter, BUTTER I say! A tiny bit for opacity, so creamy. LOVE!!!
Must haves? Well, I want the whole collection but from what I have here - Bride to be for the everyday look. Mulbery as a vampy colour and . Brick Red because everyone needs a red. Probably you don't NEED Aztec Gold, but you're going to want it really, really badly. And I think everyone should own a black and white lipstick for mixing purposes. It means that the lipsticks you already have can always be customised for your outfit or mood.
The colour longevity on all of these is amazing. I did a shoot this afternoon where I mixed about seven of the colours together to create the perfect shade and it lasted through 4 and a half hours of shooting and I didn't have to touch it up once. It applies evenly and well.
I really cannot say enough good things about these lipsticks other then I NEED ALL OF THEM!!!!
If you feel like you also need some (or all, hey I'm certainly not judging you for it!), the store is open to the public on Saturday mornings and 24/7 online at their website.
I've got pictures of these on the lips coming up shortly. Just as soon as I get some time and some sunlight to actually do it. More product reviews coming up soon as well!
Enjoy what's left of your weekend and be awesome to each other.
The store and brand is called Makeup & Glow and is the brainchild of one of the best bridal makeup artists I have ever come across, Rachael Parnell. She noticed that there was a huge gap in the market for pro brands to be brought into Australia and made available to professional makeup artists.
So lets talk about the lipsticks. I have ten of them. 5 of the best sellers were provided for review and 5 I bought myself. I can honestly say that the quality of these blow my mind. I'm sure you guys want to know how much these are, and I would still pay for them if they were double or even triple the price. They are $5.95 each. Yes, really. If you don't believe me, go look for yourself.
You get a huge 37mm pan which is about the size of an actual lube of lipstick melted down. I know this because I do it all the time.
So first things first, lets start with the popular shades -
 |
| L-R - Bride to Be, Tango Pink, Salmon, Love Heart, Mother of the Bride, Red Brick |

Bride to Be is an amazing dusty deep pink, which not surprisingly is a great bridal colour. I love using this colour for weddings because it's so easy to grab a backup pan and give it to the bride along with a disposable lip brush for touch ups during her big day. Opacity is amazing, it's super smooth, super creamy and really quite moisturising.
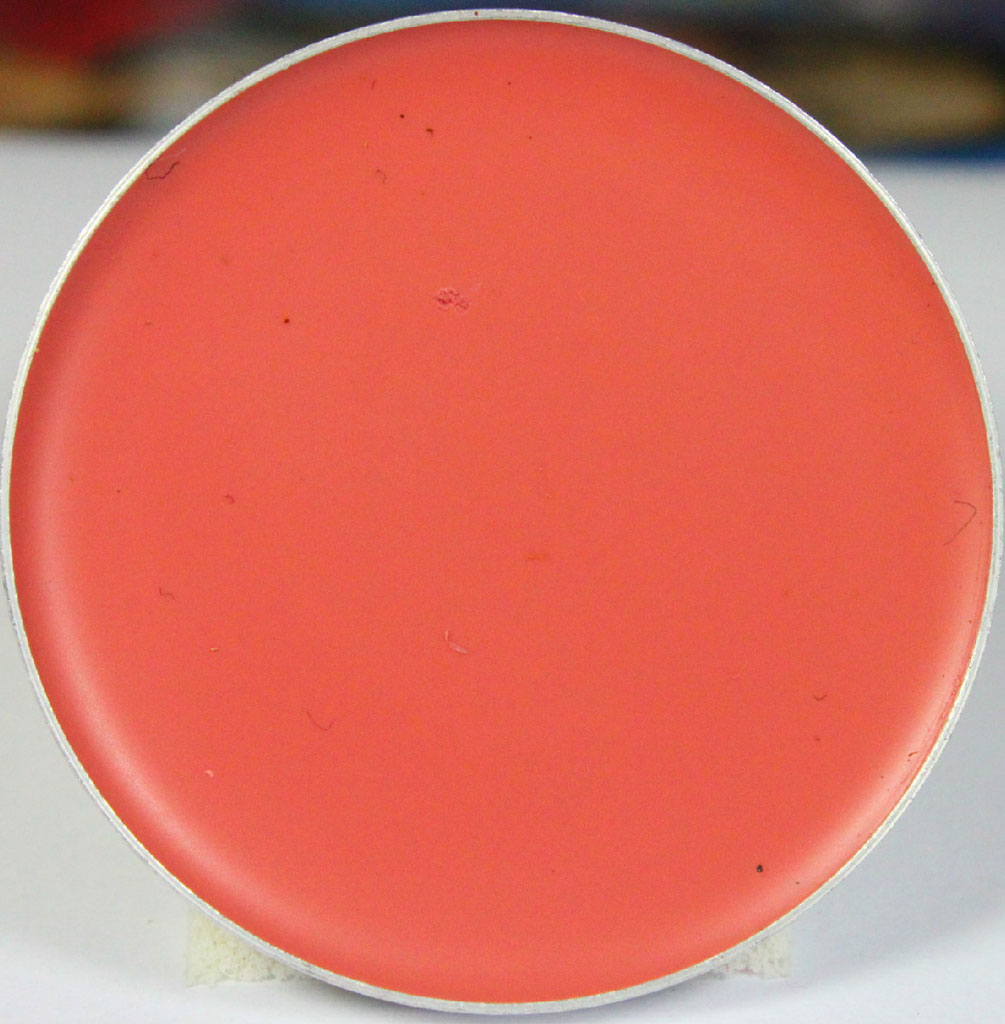
Salmon is exactly as it is named. A creamy, opaque salmon colour which is more flattering then you would think. I would call this almost a coral shade, but a lot more wearable for more people.

Tango Pink is a brighter version of Bride to Be. Still really wearable and work appropriate. Again, really creamy and opaque.

Love Heart is one of my favourites because I do love a hot pink lippie. It's a seriously fun colour and I love it.

Mother of the Bride is another really popular colour. It's a plum colour and it looks amazing on mature ladies as well as younger women.
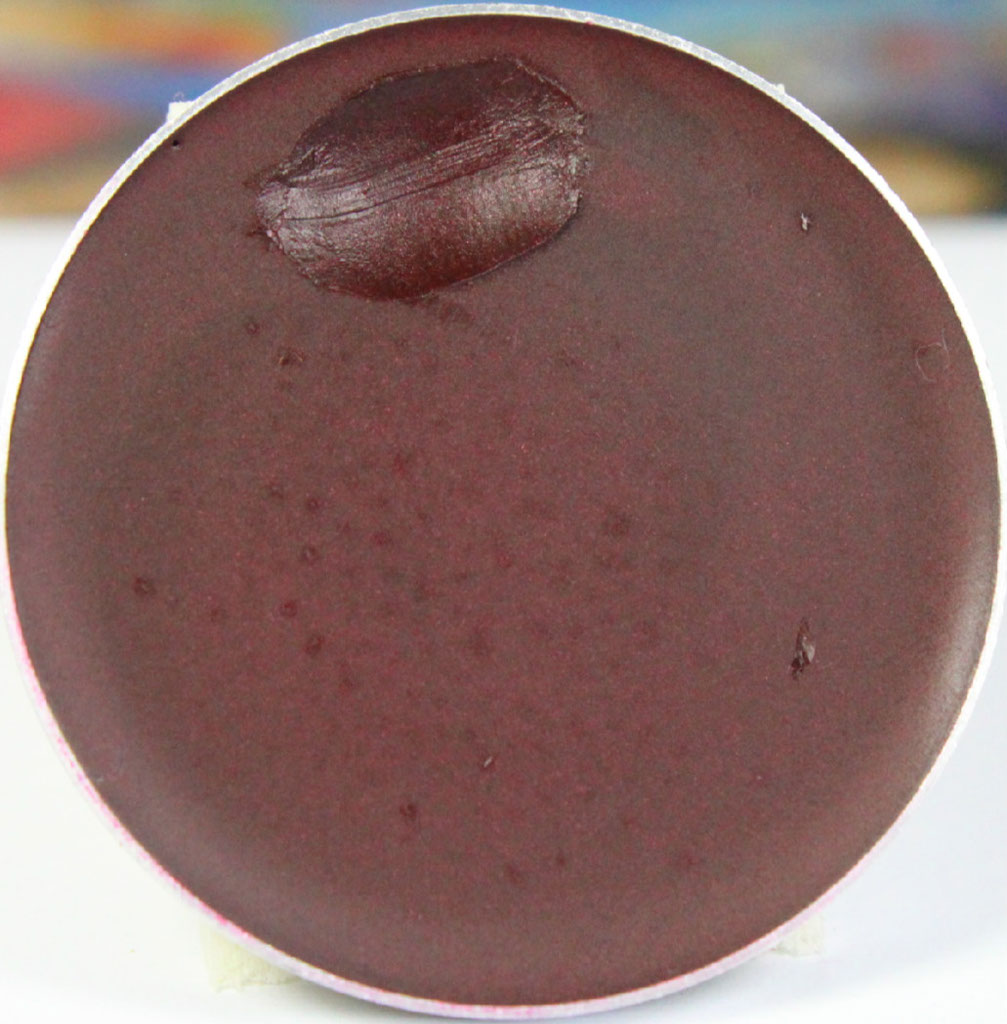
Mulbury looks much deeper in the pan then it actually comes out in real life. This one has an almost glossy finish to it and I love using it to mix in to make a red lipstick a little more vampy without going for a solid purple lip. Also, I may have gotten a little excited and used this colour before I took a photo.
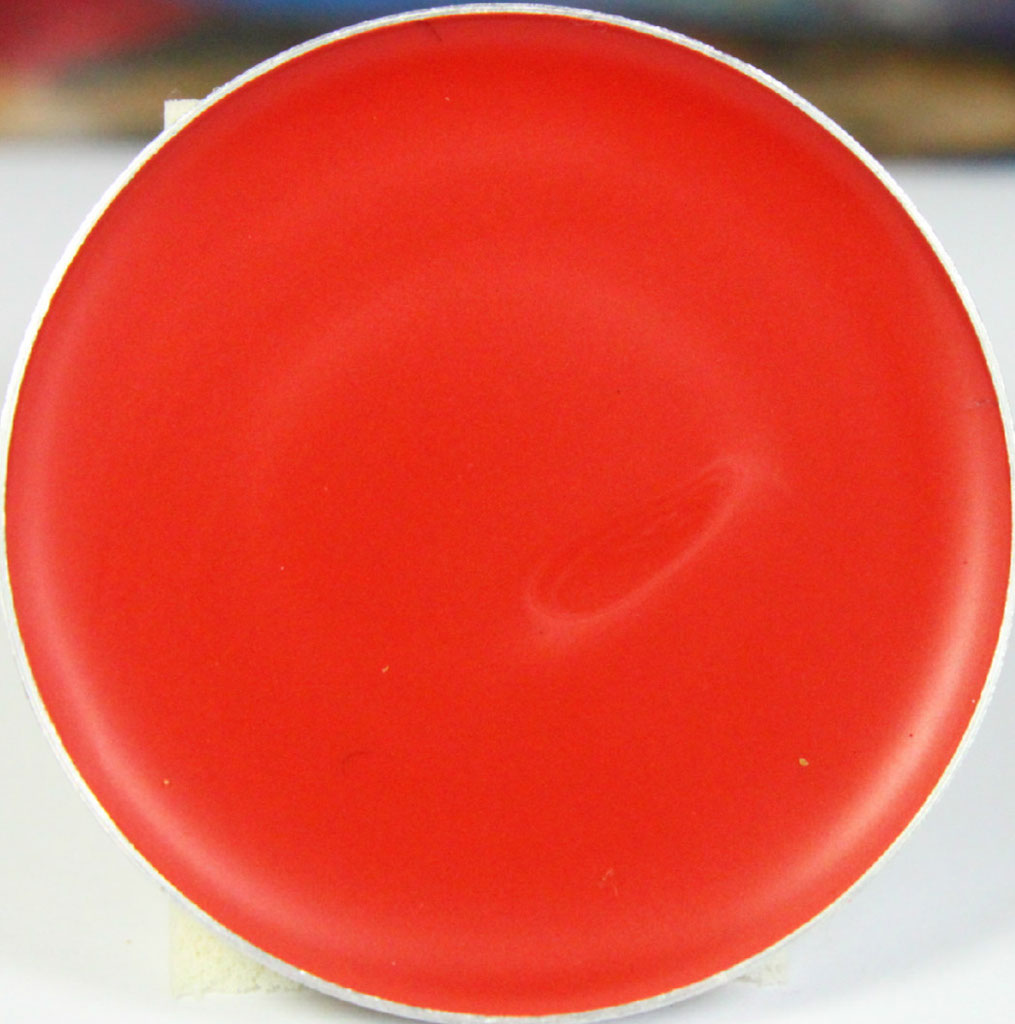
Brick Red is a really great colour. It's a deep, almost tomato red, but deeper. Think Campbell's Tomato Soup, that's what it reminds me of.
Now we are getting to the mixing colours.

L-R - White Orchid, Aztec Gold, Little Black Dress

White Orchid is creamy and a solid colour but it does require a little more product then the others to build up opacity, but that is to be expected and really, who wants to wear stark white lipstick? I use this to lighten custom mixed lipsticks all the time, making it one of the most used shades in my kit.

Same goes for Little Black Dress. Great mixing colour, needs a little more product for a solid lip coverage but when darkening a lip colour, a little goes a long way.

My absolute favourite of the collection is surprisingly Aztec Gold. I really didn't expect to love this the way I do. It applies like butter, BUTTER I say! A tiny bit for opacity, so creamy. LOVE!!!
Must haves? Well, I want the whole collection but from what I have here - Bride to be for the everyday look. Mulbery as a vampy colour and . Brick Red because everyone needs a red. Probably you don't NEED Aztec Gold, but you're going to want it really, really badly. And I think everyone should own a black and white lipstick for mixing purposes. It means that the lipsticks you already have can always be customised for your outfit or mood.
The colour longevity on all of these is amazing. I did a shoot this afternoon where I mixed about seven of the colours together to create the perfect shade and it lasted through 4 and a half hours of shooting and I didn't have to touch it up once. It applies evenly and well.
I really cannot say enough good things about these lipsticks other then I NEED ALL OF THEM!!!!
If you feel like you also need some (or all, hey I'm certainly not judging you for it!), the store is open to the public on Saturday mornings and 24/7 online at their website.
I've got pictures of these on the lips coming up shortly. Just as soon as I get some time and some sunlight to actually do it. More product reviews coming up soon as well!
Enjoy what's left of your weekend and be awesome to each other.


 Then there was the student makeup that was inspired by Alice in Wonderland.


