Showing posts with label makeup and glow. Show all posts
Ok, so here we are with part two of my guide to the best brushes you can get for the best price.

Today we are talking about the face. So let's start with the base. The base is the most important part of a makeup. If you don't have amazing looking skin, then no matter how much colour you apply on top, it's not going to look as good as it could be - so it's important that you are using the right tools to ensure you are getting the best out of the products you use.

You'll need a great foundation brush. You'll use it to apply moisturiser, primer, foundation, blend concealer, pretty much anything you like.

I have lots of these, because my needs change depending on my client, but the one I love the most is the Angle Synthetic Foundation Brush from Crown ($14). I particularly love that the angle of the bristles allows you to get right into the all curves of the face like the nose and around the ears.


A great concealer brush is is also vital. I tend to favour my Sedona Lace Flat Synthetic Brush ($8.95). It's the perfect density to work around the nose, chin and forehead. Around the eyes, I actually use the fluffy blending brush from Gorgeous Cosmetics that I mentioned in the last post. I do love a multipurpose brush, and I find the fluffiness of this one is great for softly blending in cream concealers without highlighting any fine lines.


If you like contouring with creams like I do, you're going to need an amazing buffing brush, and trust me when I say I searched high and low to find this one - the Sedona Lace FB07 ($14.95). The soft, yet extremely dense brush makes buffing and blending a breeze.


A big fluffy brush is always important for powdering down a look, I have two which I love, the Gorgeous Cosmetics Powder Brush ($63) and the Real Techniques by Samantha Chapman Powder Brush ($10). Both work just as well as each other, I prefer the Gorgeous one, because I just like the way it sits in my hand.


One of my favourite brushes is my blush brush which I use for blush, highlight, dusting powder - anything really. It's the Pro Blush 330 from Makeup and Glow ($25.90). It's so soft and fluffy and my my clients always comment on how gentle it feels on their face.


For brows, I always come back to my Royal and Langnickel Silk Brow Brush ($5.99). It's perfect for filling in brows with powder and blending out harsh pencil lines.


Lastly, lips. I use a combination of brushes depending on what I need, but what I'll show you is the one I use the most. The Royal and Langnickel Silk Lip C601-S ($4.99) is a medium sized bullet tipped synthetic brush that holds a great amount of product and provides solid even coverage.


So that's it. All the brushes you need to be a makeup superstar. You may not even need all of them - if you don't like to apply your lipstick with a brush, then don't. I do for hygiene reasons, but if it's just you using your tube of lipstick, then you don't need that one.

That's it for today. Next up I have the last few tools you should have for a flawless face. Once again, the links are below for the brushes discussed.

Angled Foundation Brush
Concealer Brush
Buffing Brush
Pro Blush
Powder Brush (Gorgeous Cosmetics)
Powder Brush (Real Techniques)
Brow Brush
Lip Brush

So you guys seemed to like my first post on quality lipsticks for less so I thought I'd follow it up with a brand you probably haven't heard of because it's a Brisbane based makeup supply store who started their own line of products. And they are simply AMAZING.

The store and brand is called Makeup & Glow and is the brainchild of one of the best bridal makeup artists I have ever come across, Rachael Parnell. She noticed that there was a huge gap in the market for pro brands to be brought into Australia and made available to professional makeup artists.

So lets talk about the lipsticks. I have ten of them. 5 of the best sellers were provided for review and 5 I bought myself. I can honestly say that the quality of these blow my mind. I'm sure you guys want to know how much these are, and I would still pay for them if they were double or even triple the price. They are $5.95 each. Yes, really. If you don't believe me, go look for yourself.

You get a huge 37mm pan which is about the size of an actual lube of lipstick melted down. I know this because I do it all the time.

So first things first, lets start with the popular shades -

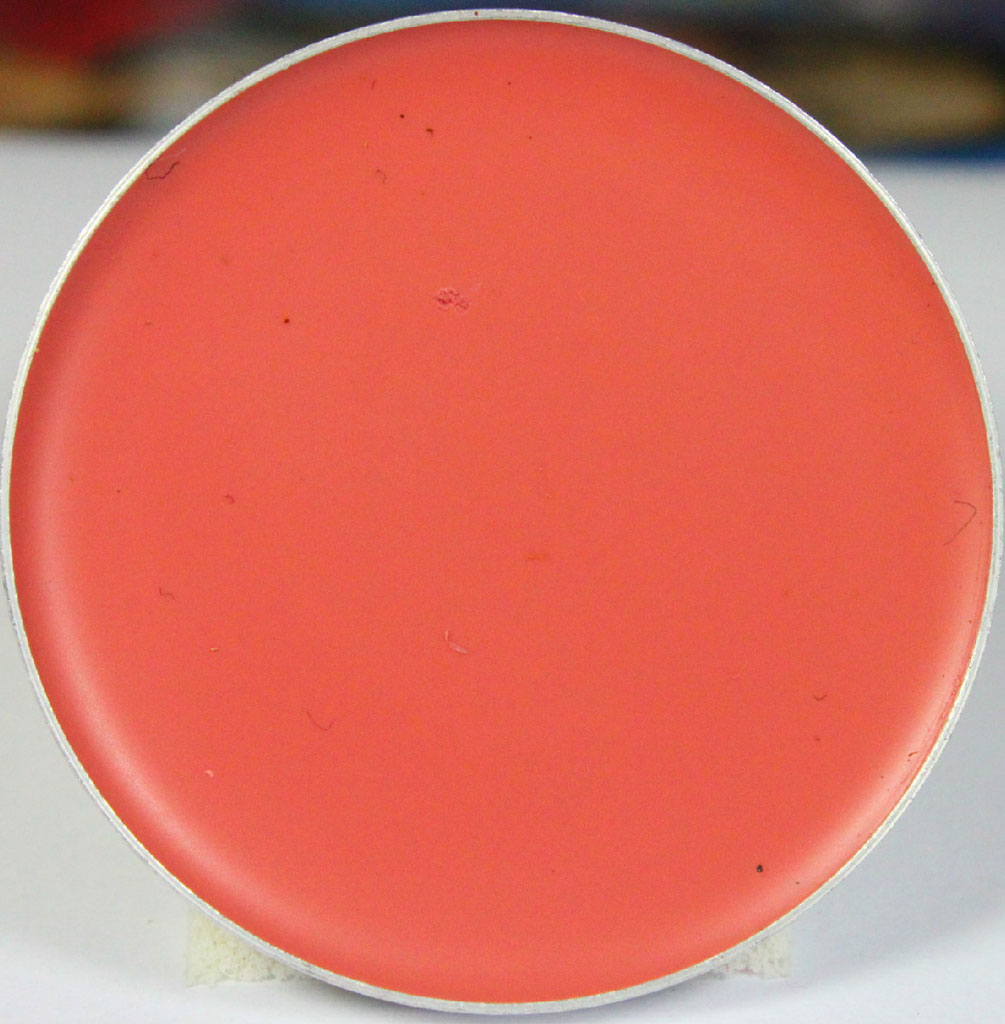
L-R - Bride to Be, Tango Pink, Salmon, Love Heart, Mother of the Bride, Red Brick


Bride to Be is an amazing dusty deep pink, which not surprisingly is a great bridal colour. I love using this colour for weddings because it's so easy to grab a backup pan and give it to the bride along with a disposable lip brush for touch ups during her big day. Opacity is amazing, it's super smooth, super creamy and really quite moisturising.


Salmon is exactly as it is named. A creamy, opaque salmon colour which is more flattering then you would think. I would call this almost a coral shade, but a lot more wearable for more people.


Tango Pink is a brighter version of Bride to Be. Still really wearable and work appropriate. Again, really creamy and opaque.


Love Heart is one of my favourites because I do love a hot pink lippie. It's a seriously fun colour and I love it.


Mother of the Bride is another really popular colour. It's a plum colour and it looks amazing on mature ladies as well as younger women.


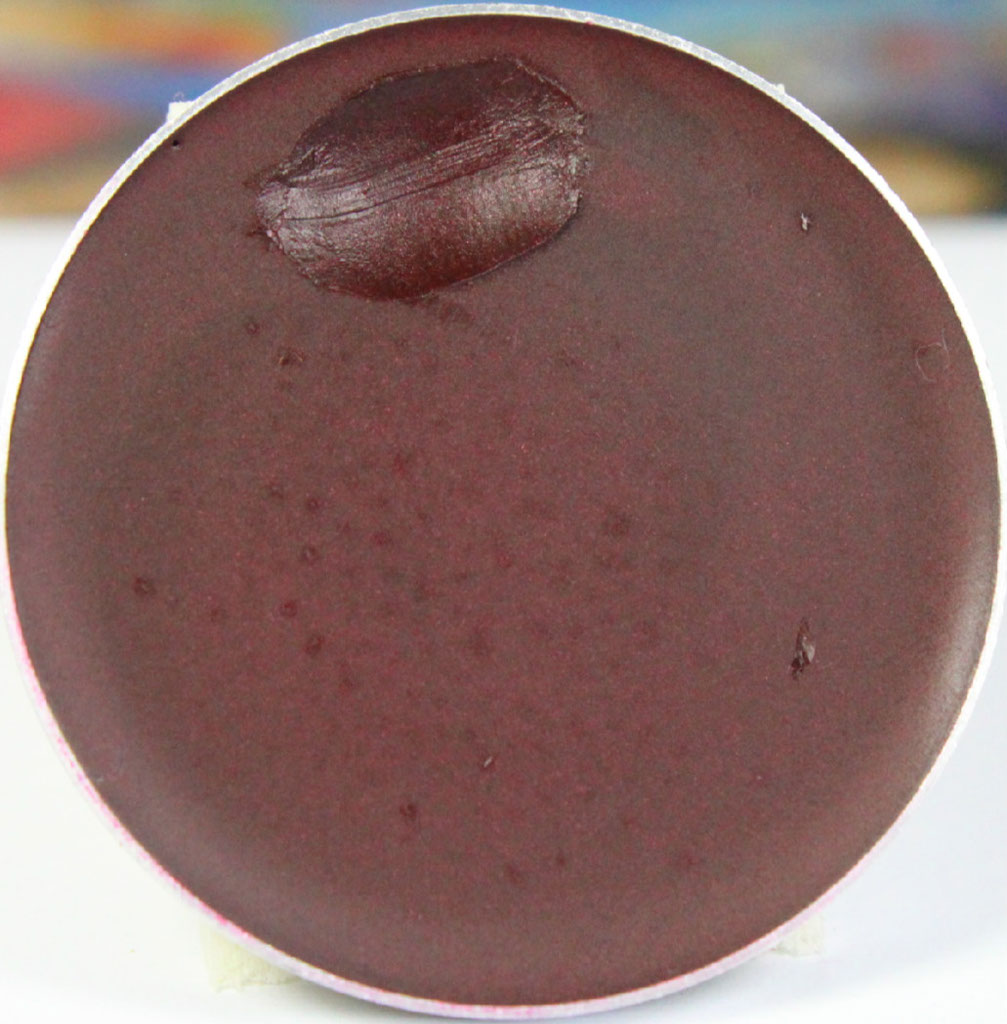
Mulbury looks much deeper in the pan then it actually comes out in real life. This one has an almost glossy finish to it and I love using it to mix in to make a red lipstick a little more vampy without going for a solid purple lip. Also, I may have gotten a little excited and used this colour before I took a photo.


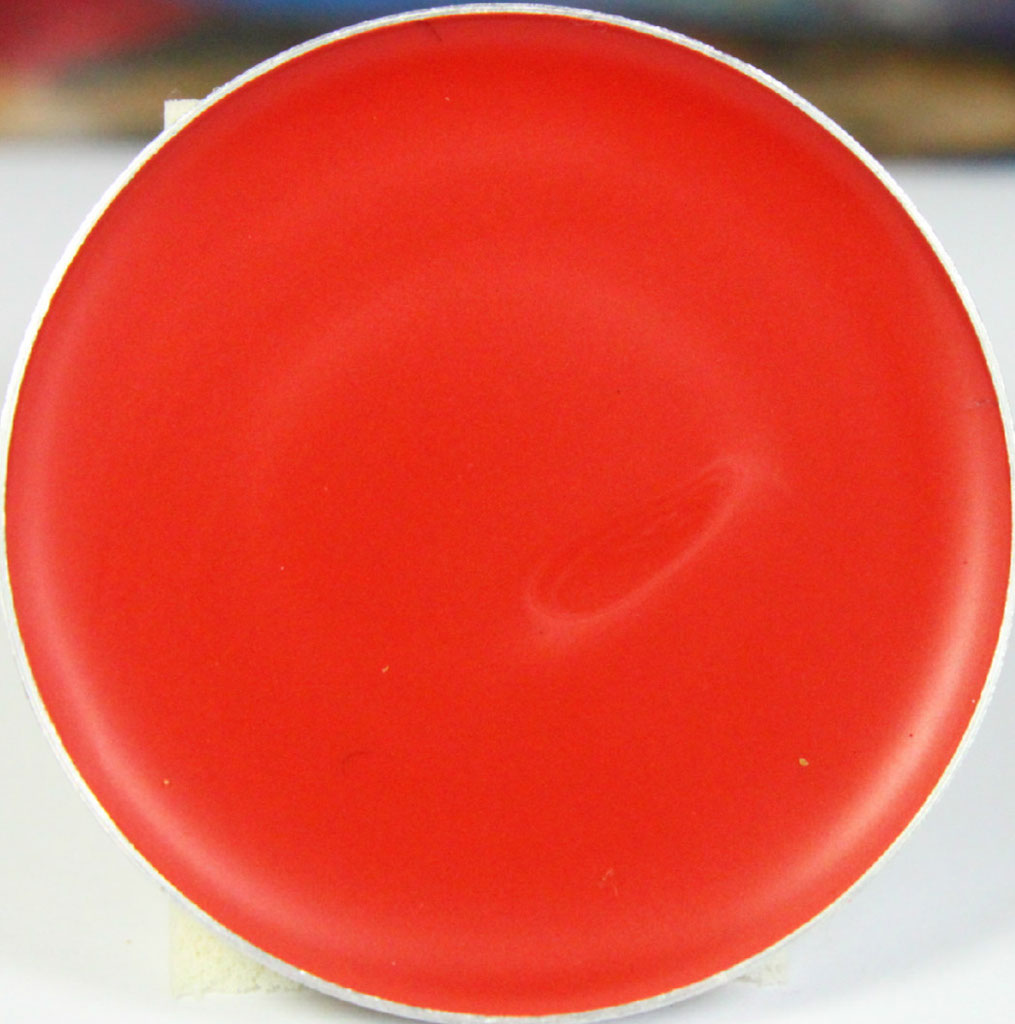
Brick Red is a really great colour. It's a deep, almost tomato red, but deeper. Think Campbell's Tomato Soup, that's what it reminds me of.

Now we are getting to the mixing colours.

L-R - White Orchid, Aztec Gold, Little Black Dress


White Orchid is creamy and a solid colour but it does require a little more product then the others to build up opacity, but that is to be expected and really, who wants to wear stark white lipstick? I use this to lighten custom mixed lipsticks all the time, making it one of the most used shades in my kit.


Same goes for Little Black Dress. Great mixing colour, needs a little more product for a solid lip coverage but when darkening a lip colour, a little goes a long way.


My absolute favourite of the collection is surprisingly Aztec Gold. I really didn't expect to love this the way I do. It applies like butter, BUTTER I say! A tiny bit for opacity, so creamy. LOVE!!!

Must haves? Well, I want the whole collection but from what I have here - Bride to be for the everyday look. Mulbery as a vampy colour and . Brick Red because everyone needs a red. Probably you don't NEED Aztec Gold, but you're going to want it really, really badly. And I think everyone should own a black and white lipstick for mixing purposes. It means that the lipsticks you already have can always be customised for your outfit or mood.

The colour longevity on all of these is amazing. I did a shoot this afternoon where I mixed about seven of the colours together to create the perfect shade and it lasted through 4 and a half hours of shooting and I didn't have to touch it up once. It applies evenly and well.

I really cannot say enough good things about these lipsticks other then I NEED ALL OF THEM!!!!

If you feel like you also need some (or all, hey I'm certainly not judging you for it!), the store is open to the public on Saturday mornings and 24/7 online at their website.

I've got pictures of these on the lips coming up shortly. Just as soon as I get some time and some sunlight to actually do it. More product reviews coming up soon as well!

Enjoy what's left of your weekend and be awesome to each other.
The reason you read a blog by a makeup artist is because you want the tips and tricks right? Well, here you go...

You want to know what the big secret to an amazing pout is? Lip prep and care. Do you really think that lips like, oh I don't know, Rosie Huntington Whiteley's, don't take constant work? Not hard work mind you, but constantly exfoliating and using a moisturising balm.
I love Lucas Pawpaw Ointment. Not only is it an amazing product that is used by makeup artists and consumers worldwide, it was created and continues to be made a few suburbs away from where I live here in Brisbane which makes it a true local success story. I use this on shoots and for weddings when I come across a client with extremely dry and flakey lips. You can also easily do this at home. I apply it liberally before I do anything else so it has time to work it's magic. It's thick, very thick. I also always carry soft disposable toothbrushes in my kit, however a clean mascara wand will also do in a pinch. Once I've let the lips soften (usually around half an hour), I will wipe the ointment off and gently scrub the flakey bits of skin away. Ta-da! Baby soft lips.

I also love Rosebud Perfume Co's Smith's Rosebud Salve. This is my holy grail lip product. I use it on myself, I am known for carrying around additional tubes and tins and giving them away to people to convert them. It's an amazing, magic product. It's also not that easy to get a hold of here in Australia unless you want to pay $30 a tin. Unless you have connections like I do. Want to know where I buy mine? Right here. Want the tube? Try this one instead. And for $10! Bargain.


So what comes after lip prep? Liner. Looks great under lipstick or just a gloss, it adds a touch of colour to your lip and adds to the longevity of your lip product. Another thing that I love about liners is that you have have one lipstick and 4 different coloured liners - layer those bad boys and it's like having 4 more shades which is super helpful where you find that elusive PERFECT lipstick shade! It means that it might be a medium plum colour but layered over a deeper red liner, you've added depth to the colour and created the perfect nighttime vampy colour. Want to make that same colour work appropriate? Pair it with a nude liner or a light pink. Want to make it bright? Try it over a hot pink. Experiment! That's the exciting part of makeup - it washes off, so you can go nuts!

Another liner tip I have is a method that I find works really well for me. When I first started to use liner I would painstakingly try to colour in the whole lip. Not anymore. I line the lips (fairly roughly unless it's a red or hot pink because then it's noticeable), colour in the middle section then use my ring finger to blend out the colour. You get even distribution, and the heat from your finger softens the wax in the liner and makes it easier to move around. You don't get strong, harsh lip lines either which I find can often really harden an overall makeup look. Have a cotton tip dipped in remover on standby for any times you get a little too enthusiastic and go outside the lip line, but accuracy will come with practice.


Then apply your lip colour of choice. You may like to apply it from the tube, you may like to use a brush. Sometimes I use my fingers to pat it on. Don't worry, I use HEAPS of hand sanitiser while I'm working! Always have that cotton tip dipped in remover nearby to remove any excess product. Don't stress if you lips look uneven. Every ones lips actually are uneven. You just need to play until you learn what corrective method works better for you.

So there you have it, my tips and tricks to the perfect pout. I'm sure there's more and I'll add them as I think of them. Do you guys have any to share?

That's it from me today. I'm so excited to share some new products with you from one of my favourite stores over the next few weeks. It took all my restraint to not stick my brushes straight into the eye shadows before I photographed them!

Be awesome to each other.