Showing posts with label makeup. Show all posts
Ok, so here we are with part two of my guide to the best brushes you can get for the best price.

Today we are talking about the face. So let's start with the base. The base is the most important part of a makeup. If you don't have amazing looking skin, then no matter how much colour you apply on top, it's not going to look as good as it could be - so it's important that you are using the right tools to ensure you are getting the best out of the products you use.

You'll need a great foundation brush. You'll use it to apply moisturiser, primer, foundation, blend concealer, pretty much anything you like.

I have lots of these, because my needs change depending on my client, but the one I love the most is the Angle Synthetic Foundation Brush from Crown ($14). I particularly love that the angle of the bristles allows you to get right into the all curves of the face like the nose and around the ears.


A great concealer brush is is also vital. I tend to favour my Sedona Lace Flat Synthetic Brush ($8.95). It's the perfect density to work around the nose, chin and forehead. Around the eyes, I actually use the fluffy blending brush from Gorgeous Cosmetics that I mentioned in the last post. I do love a multipurpose brush, and I find the fluffiness of this one is great for softly blending in cream concealers without highlighting any fine lines.


If you like contouring with creams like I do, you're going to need an amazing buffing brush, and trust me when I say I searched high and low to find this one - the Sedona Lace FB07 ($14.95). The soft, yet extremely dense brush makes buffing and blending a breeze.


A big fluffy brush is always important for powdering down a look, I have two which I love, the Gorgeous Cosmetics Powder Brush ($63) and the Real Techniques by Samantha Chapman Powder Brush ($10). Both work just as well as each other, I prefer the Gorgeous one, because I just like the way it sits in my hand.


One of my favourite brushes is my blush brush which I use for blush, highlight, dusting powder - anything really. It's the Pro Blush 330 from Makeup and Glow ($25.90). It's so soft and fluffy and my my clients always comment on how gentle it feels on their face.


For brows, I always come back to my Royal and Langnickel Silk Brow Brush ($5.99). It's perfect for filling in brows with powder and blending out harsh pencil lines.


Lastly, lips. I use a combination of brushes depending on what I need, but what I'll show you is the one I use the most. The Royal and Langnickel Silk Lip C601-S ($4.99) is a medium sized bullet tipped synthetic brush that holds a great amount of product and provides solid even coverage.


So that's it. All the brushes you need to be a makeup superstar. You may not even need all of them - if you don't like to apply your lipstick with a brush, then don't. I do for hygiene reasons, but if it's just you using your tube of lipstick, then you don't need that one.

That's it for today. Next up I have the last few tools you should have for a flawless face. Once again, the links are below for the brushes discussed.

Angled Foundation Brush
Concealer Brush
Buffing Brush
Pro Blush
Powder Brush (Gorgeous Cosmetics)
Powder Brush (Real Techniques)
Brow Brush
Lip Brush

One of the things I get asked a lot about as a makeup artist is what tools I use, where I get them and why I pay so much for them.

The simple answer is - because you get what you pay for. Being a makeup artist, I can use the best makeup on the market on a client, but if it's applied with brushes and sponges that aren't soft enough, or that shed, or bleed colour, then what's the point?

Like anything in life, if you want quality and durability, you have to pay for it. Of course, there are some exceptions to the rule which I am going to share them with you, but if you are wondering why that set of 40 brushes covered in MAC branding that you bought off eBay for $40 aren't doing as well as you hoped, it probably because (a) they're fake, (b) they're made from the cheapest, harshest materials possible, and (c) you know you've been ripped off, even if it's only deep down.

Let me clear something up for you, if you see a brush set from a professional brand like MAC or Bobbi Brown on eBay like that, walk away. It's fake, substandard and it's going to be a pain in the ass picking off all the hair that will shed like crazy the very first time (and every time after that) that you use them.

While we are at it, let me let you in a on little secret - as a regular consumer, you don't need 40 different brushes. I have hundreds, but I have 5 of the same brush, because I know from plenty of experience that you only need a few brushes to make your makeup look amazing, and I'm going to tell you which ones.

I'm gonna break this down into sections for you guys, so lets start with eyes today.

Eye Brushes

You need to have a stiff flat brush to pack eyeshadow onto the lid - my personal favourite is the C208 Chisel Deluxe Fluff from Crown Brush ($5.45) - cheap and cheerful.


Then you need a brush to blend colour into the corner of the eye and the crease. I use the Pro Pencil Blender 149 ($5.99) from Royal and Langnickel.


You also need something soft and fluffy for blending a soft highlight under the brow bone. I have the B112 Shadow Blended from Gorgeous Cosmetics, but to be honest, that one retails for $41, and I don't love it enough to spend that much on it. I got mine as part of my brush role when I started training.


If I was having to buy another, I would probably go for the Master Pro Tapered Blender from Royal and Langnickel ($9.99)


So you've got all your shadows in place, and now you just need blend it all out right? I love, love, love my Sedona Lace Blender EB13 ($8.95) I know others swear by the MAC 217 ($37) but I've used them both and always go back to the EB13.


To finish off the look, you're going to need liner, but there are so many types of liner brushes out there...
Bent Liner (Sedona Lace EB19 $8.95)


Flat Liner (Crown Italian Badger $4.15)


Angle Liner (Crown Brush Italian Badger $4.35)


So which is the right one? I can't actually tell you that. This one really comes down to personal preference and what you are more comfortable with, I personally will usually fluctuate on what I prefer to use, so I have all three.

So that's it for eyes. 6 brushes, and they don't have to break the budget if you know where to look. If you were to pick up similar brushes from somewhere like, say MAC, you'd be looking at around $48 for the 239, $54 for the 224, $45 for the 219, $37 for the 217, $37 for 263, a total of $221. If you follow my guide, $39.33. That's right, less than $40 for the brushes that will make your life so much easier.

So I hope this has helped out, and I will put links to each brush below.

Angle Liner
Flat Liner
Bent Liner
Chisel Deluxe Fluff
Pro Pencil Blender
Pro Tapered Blender
B112 Shadow Blender
Blender EB13

Continuing on with Swatch-a-palooza, here is a glimpse into my pro kit. I have 25 OCC Lip Tars. I had more but they inevitably get stolen on shoots by models and assistants once they realise how awesome they are, the most recent casualty - my black one - Tarred. Very annoying.

I'm not saying you need all these colours, hell you only really need primary colours, a black and white and you can mix any shade you like. I just like having premixed colours so that I don't have to spend as much time mixing, since I can grab something close to the shade I'm after and just add a little to change it depending on my needs.

So lets jump straight into the pictures.

L-R - Feathered, Butch, Chlorophyll, NSFW
As you can see, Feathered is not opaque in comparison to the others and is prone to the mixture separating. I use it only in mixing colours so it's not an issue for me, but if you are looking for a solid white lip colour, this is not the one you are looking for.

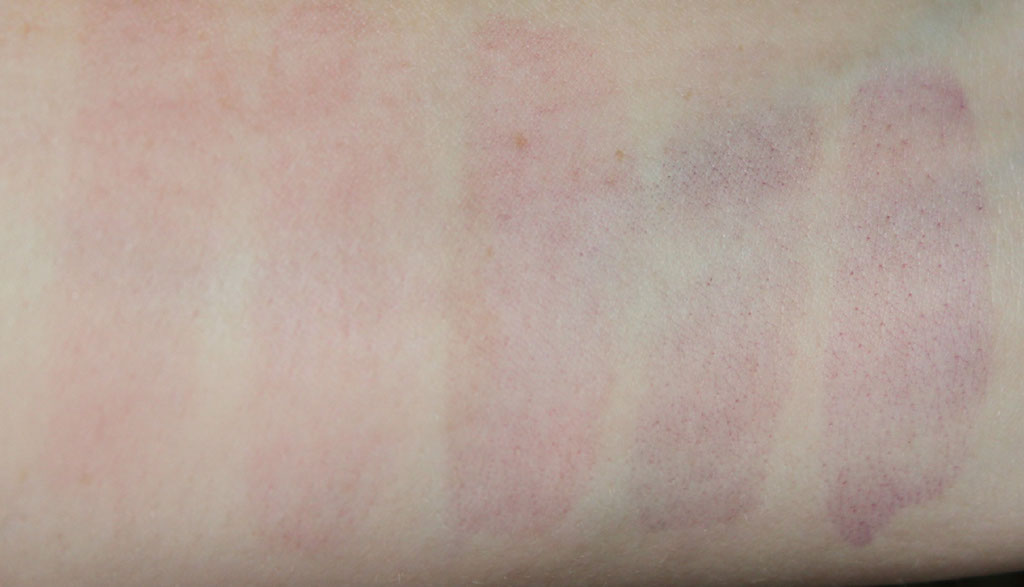
Heads up - these stain. Particularly the red NSFW which great for your lips, not so much your arm. I maybe had this one for 3 mins max to get this level of stain.

Tone, Hush, Trick, Uber, Pennyroyal

Devine, Grandma, Kava Kava

Memento, Narcissus, Pretty Boy, Anime

Digitalis, Pageant, Demure, Katricia, Belladonna

The purples also stain and quickly.

The new-ish metallic Lip Tars - Triptych, Electric Grandma, Super NSFW, Authentic. Love these!

One thing I find about OCC Lip Tars is that they can be incredibly drying on lips. I always prime with something really heavy duty like Paw Paw ointment and scrub the lips to remove any dead skin before applying these as they will emphasise dryness. I love that they dry to a matte finish and that once dry, they aren't going anywhere. The downside to this is that some of them stain pretty badly, namely the reds and purples.

A lip liner with these is an absolute must, as is being so careful that you don't use too much. I know some people think I'm exaggerating when I say that I use a pinhead sized drop of product for the whole lip area. I'm not. If you use anymore then that, the product will run and feather and will be a nasty mess. I've found that the people who dislike using Lip Tars and claim they can't see what the fuss is about are the ones who use a little too much.

This is a superb product but one you have to know how to use properly to achieve an amazing look. You need to have prepared your lips, exfoliated, primed and lined, before application.

These are phenomenal value for money at $18 each here and cheaper in the US. These will last a really long time and you can't fault the colour payoff, as you can see above.

My one gripe is that the packaging has a tendency to randomly explode leaving you will a sticky, highly pigmented mess to clean up. Luckily this has never happened to me (touch wood) but I have plenty of makeup artist friends who have lost a tube or two to a colour explosion in their kit. It's a devastating thing. I never leave mine in my main kit for that reason, only packing them when I know I need them. And always in a separate snap lock bag - just in case.

Do you have Lip Tars? Do you love them? Any tips you want to share?

So you guys seemed to like my first post on quality lipsticks for less so I thought I'd follow it up with a brand you probably haven't heard of because it's a Brisbane based makeup supply store who started their own line of products. And they are simply AMAZING.

The store and brand is called Makeup & Glow and is the brainchild of one of the best bridal makeup artists I have ever come across, Rachael Parnell. She noticed that there was a huge gap in the market for pro brands to be brought into Australia and made available to professional makeup artists.

So lets talk about the lipsticks. I have ten of them. 5 of the best sellers were provided for review and 5 I bought myself. I can honestly say that the quality of these blow my mind. I'm sure you guys want to know how much these are, and I would still pay for them if they were double or even triple the price. They are $5.95 each. Yes, really. If you don't believe me, go look for yourself.

You get a huge 37mm pan which is about the size of an actual lube of lipstick melted down. I know this because I do it all the time.

So first things first, lets start with the popular shades -

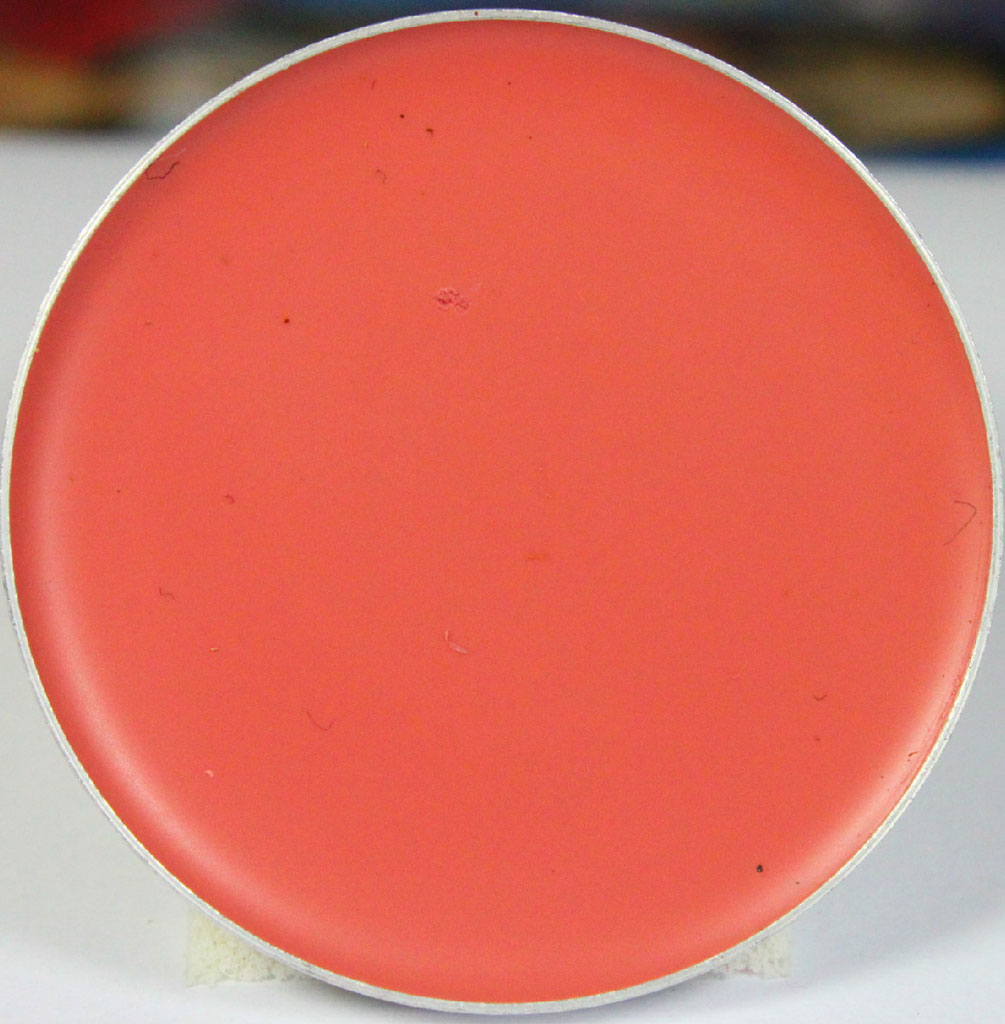
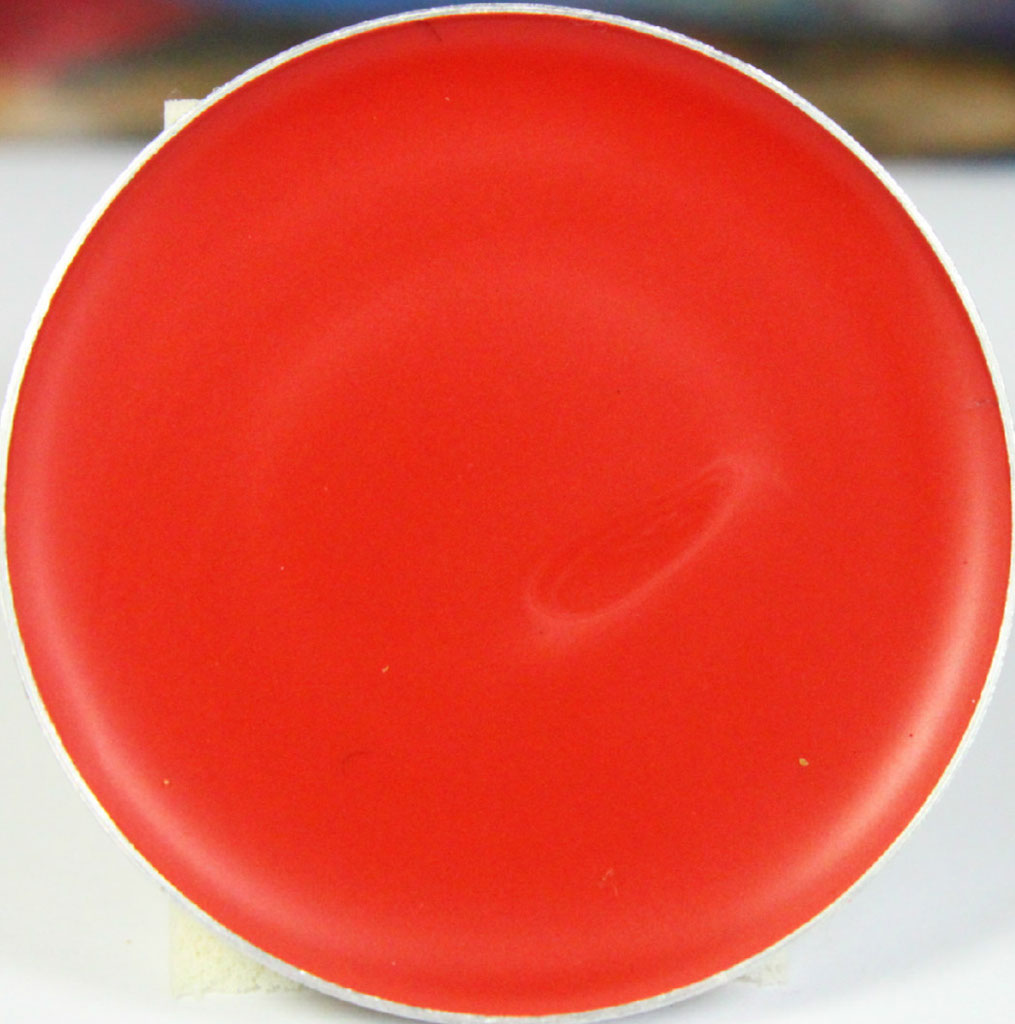
L-R - Bride to Be, Tango Pink, Salmon, Love Heart, Mother of the Bride, Red Brick


Bride to Be is an amazing dusty deep pink, which not surprisingly is a great bridal colour. I love using this colour for weddings because it's so easy to grab a backup pan and give it to the bride along with a disposable lip brush for touch ups during her big day. Opacity is amazing, it's super smooth, super creamy and really quite moisturising.


Salmon is exactly as it is named. A creamy, opaque salmon colour which is more flattering then you would think. I would call this almost a coral shade, but a lot more wearable for more people.


Tango Pink is a brighter version of Bride to Be. Still really wearable and work appropriate. Again, really creamy and opaque.


Love Heart is one of my favourites because I do love a hot pink lippie. It's a seriously fun colour and I love it.


Mother of the Bride is another really popular colour. It's a plum colour and it looks amazing on mature ladies as well as younger women.


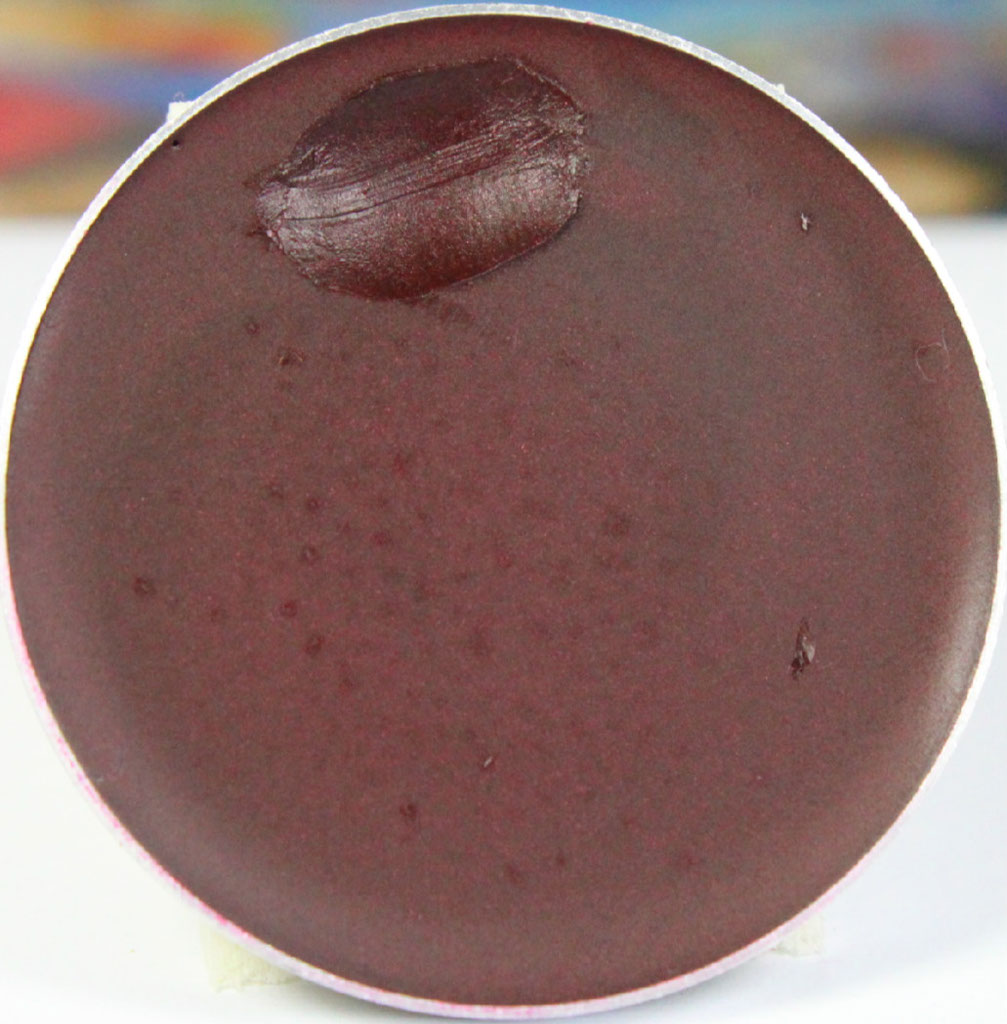
Mulbury looks much deeper in the pan then it actually comes out in real life. This one has an almost glossy finish to it and I love using it to mix in to make a red lipstick a little more vampy without going for a solid purple lip. Also, I may have gotten a little excited and used this colour before I took a photo.


Brick Red is a really great colour. It's a deep, almost tomato red, but deeper. Think Campbell's Tomato Soup, that's what it reminds me of.

Now we are getting to the mixing colours.

L-R - White Orchid, Aztec Gold, Little Black Dress


White Orchid is creamy and a solid colour but it does require a little more product then the others to build up opacity, but that is to be expected and really, who wants to wear stark white lipstick? I use this to lighten custom mixed lipsticks all the time, making it one of the most used shades in my kit.


Same goes for Little Black Dress. Great mixing colour, needs a little more product for a solid lip coverage but when darkening a lip colour, a little goes a long way.


My absolute favourite of the collection is surprisingly Aztec Gold. I really didn't expect to love this the way I do. It applies like butter, BUTTER I say! A tiny bit for opacity, so creamy. LOVE!!!

Must haves? Well, I want the whole collection but from what I have here - Bride to be for the everyday look. Mulbery as a vampy colour and . Brick Red because everyone needs a red. Probably you don't NEED Aztec Gold, but you're going to want it really, really badly. And I think everyone should own a black and white lipstick for mixing purposes. It means that the lipsticks you already have can always be customised for your outfit or mood.

The colour longevity on all of these is amazing. I did a shoot this afternoon where I mixed about seven of the colours together to create the perfect shade and it lasted through 4 and a half hours of shooting and I didn't have to touch it up once. It applies evenly and well.

I really cannot say enough good things about these lipsticks other then I NEED ALL OF THEM!!!!

If you feel like you also need some (or all, hey I'm certainly not judging you for it!), the store is open to the public on Saturday mornings and 24/7 online at their website.

I've got pictures of these on the lips coming up shortly. Just as soon as I get some time and some sunlight to actually do it. More product reviews coming up soon as well!

Enjoy what's left of your weekend and be awesome to each other.
The reason you read a blog by a makeup artist is because you want the tips and tricks right? Well, here you go...

You want to know what the big secret to an amazing pout is? Lip prep and care. Do you really think that lips like, oh I don't know, Rosie Huntington Whiteley's, don't take constant work? Not hard work mind you, but constantly exfoliating and using a moisturising balm.
I love Lucas Pawpaw Ointment. Not only is it an amazing product that is used by makeup artists and consumers worldwide, it was created and continues to be made a few suburbs away from where I live here in Brisbane which makes it a true local success story. I use this on shoots and for weddings when I come across a client with extremely dry and flakey lips. You can also easily do this at home. I apply it liberally before I do anything else so it has time to work it's magic. It's thick, very thick. I also always carry soft disposable toothbrushes in my kit, however a clean mascara wand will also do in a pinch. Once I've let the lips soften (usually around half an hour), I will wipe the ointment off and gently scrub the flakey bits of skin away. Ta-da! Baby soft lips.

I also love Rosebud Perfume Co's Smith's Rosebud Salve. This is my holy grail lip product. I use it on myself, I am known for carrying around additional tubes and tins and giving them away to people to convert them. It's an amazing, magic product. It's also not that easy to get a hold of here in Australia unless you want to pay $30 a tin. Unless you have connections like I do. Want to know where I buy mine? Right here. Want the tube? Try this one instead. And for $10! Bargain.


So what comes after lip prep? Liner. Looks great under lipstick or just a gloss, it adds a touch of colour to your lip and adds to the longevity of your lip product. Another thing that I love about liners is that you have have one lipstick and 4 different coloured liners - layer those bad boys and it's like having 4 more shades which is super helpful where you find that elusive PERFECT lipstick shade! It means that it might be a medium plum colour but layered over a deeper red liner, you've added depth to the colour and created the perfect nighttime vampy colour. Want to make that same colour work appropriate? Pair it with a nude liner or a light pink. Want to make it bright? Try it over a hot pink. Experiment! That's the exciting part of makeup - it washes off, so you can go nuts!

Another liner tip I have is a method that I find works really well for me. When I first started to use liner I would painstakingly try to colour in the whole lip. Not anymore. I line the lips (fairly roughly unless it's a red or hot pink because then it's noticeable), colour in the middle section then use my ring finger to blend out the colour. You get even distribution, and the heat from your finger softens the wax in the liner and makes it easier to move around. You don't get strong, harsh lip lines either which I find can often really harden an overall makeup look. Have a cotton tip dipped in remover on standby for any times you get a little too enthusiastic and go outside the lip line, but accuracy will come with practice.


Then apply your lip colour of choice. You may like to apply it from the tube, you may like to use a brush. Sometimes I use my fingers to pat it on. Don't worry, I use HEAPS of hand sanitiser while I'm working! Always have that cotton tip dipped in remover nearby to remove any excess product. Don't stress if you lips look uneven. Every ones lips actually are uneven. You just need to play until you learn what corrective method works better for you.

So there you have it, my tips and tricks to the perfect pout. I'm sure there's more and I'll add them as I think of them. Do you guys have any to share?

That's it from me today. I'm so excited to share some new products with you from one of my favourite stores over the next few weeks. It took all my restraint to not stick my brushes straight into the eye shadows before I photographed them!

Be awesome to each other.
It's been a hectic week in Bangkok. I just have not had the time to post. I've been exhausted every single night and slept like a log even though the beds were extremely hard. As in we've put a blanket over a piece of plywood hard. It seems to have been quite good for my back though.

We spent a lot of time shopping. We ended up spending three days exploring MBK, which is the really big centre with over 2500 shops. On the first day we were there and only got through 2 floors. Seriously.

We also found the Siam Discovery building which had a Madam Tussuad's so we had to go in there for the corny poses. They also had some more upmarket makeup brands like Bobbi Brown and Shu Uemura. There was also the Siam Centre where I found a MAC store, Smashbox, Etude House and a heap of boutique makeup and skin care places that I went nuts in. I now have 6 new MAC shadows, another paintpot, lots of BB creams and related products, assorted eye shadows and an AMAZING Etude House polish.

At MBK I found lots of places selling fake MAC products and fake MAC and Bobbi Brown brush sets (actually, the Bobbi Brown brush sets were surprisingly good quality, but quite good brushes if you're not ready to plunge head first into expensive brushes). There were fake designer handbags and wallets galore and while you know they are fakes, they are also well made and with actual good quality leather so I couldn't pass up on getting a few of those.

There is also a Japanese department store called Tokyu which had a few brands I hadn't heard of so I ended up getting four shadows from there just to give them a try. I also found the most adorable limited edition Hello Kitty Maybelline Mascara that I just had to have.

The food here is divine as you would expect and I am getting used to the burning in my mouth and my lips going numb.


We went on a full day tour on Tuesday which involved riding elephants (and seeing baby ones!), rafting on a rickety bamboo raft and visiting the famous bridge over the River Kwai. It was a long day, but an incredibly memorable one. Our elephant was big on walking and snacking at the same time, which was amusing. Our driver man was really cool and grabbed my camera and jumped off and started taking photos for me, which was fabulous. Considering he'd never seen any kind of camera beyond a point and shoot before he did pretty well. And he quite enjoyed learning how it worked.

I went to a ladyboy cabaret and it was awesome. It was so camp and hilarious. The best way to describe it is to imagine a badly dubbed movie, thow in some ladyboys, sequins and big hair and that's the result. I don't have any photos of that since I didn't think I would be allowed to take my camera in, but I can tell you that some of them I would not have picked. They were stunning. Quite a few were mannish and in dire need of a wax, but all in all it was fairly impressive. I'm planning on hitting another cabaret before I head home, so I will endeavour to take pics there.

The grand palace in Bangkok. The only half decent photo I managed to get on the cruise.

Last night was our final night in Bangkok and we did a night cruise and of course, it poured torrentially with rain making it impossible to take photos. While waiting for the cruise to start we killed some time in the bar with cocktails and watched an Asian Elvis impersonator who was really quite good if not under appreciated by the somewhat snobbish clientele.


We flew into Koh Samui this morning and are staying at the Outrigger, which is breathtaking. I've got so many photos that I have taken today, but I will just pick my faves. There are three pools here. Our room overlooks one of them and we have our own private spa on the deck which is awesome. Now, if we could just figure out how to work the damn thing....


I've just had dinner and it was incredibly tasty. I had stir fried chicken with cashews in a spicy brown sauce and Kim (my housemate/ travel buddy) had Massaman Curry. It was tasty too. Oh, and the most amazing smoothie which had yoghurt, honey, banana and pineapple.

There is a tropical storm going on outside so we are staying in tonight after a day of lounging on sun lounges, swimming, sitting in the spa and of course drinking cocktails at the swim up bar in the infinity pool. Ah...it's a hard life, but someones got to do it.

That's it from me today.

Be awesome to each other.
I'm back with the second lot of my MAC Venomous Villains haul. I got four Lipglasses. Here are the swatches and pictures.

Devilishly Stylish
This is Devilishly Stylish from the Cruella range. It's a nude pinkish champagne. Very user friendly. Adds a shimmer and sparkle to your lips without being over the top. Very complimentary on any skintone I would think.


 Wicked Ways
Wicked ways is also from the Cruella range. It is a cherry red that has a subtle goldish(?) shimmer. It looks patchier in person then it looks in the picture. It's a bit too think to be a full lip colour and a bit too thick to be a gloss. It looks great over a red lipstick base or even over lip liner filled in lips. Being a strong colour, it was hard to apply so that I liked the shape. The sheerer glosses allow room for error, a red does not. Ever.


Hot House
Hot House is part of the Evil Queen collection. It's an interesting colour. It's a fuchsia-purple with a strong glitter flash/ shine. Which you can see in the swatch below. The glitter is almost holographic looking in person, but glitter is described as being an iridescent fuchsia shimmer. It is a semi opaque gloss and I am still unsure whether I love it or hate it. I believe it was originally released under the name Strange Hybrid.


Revenge is Sweet
Revenge is Sweet is an interesting one. The most intriguing of the bunch to me. It was released as part of the Maleificent collection, which is my favourite of the bunch. It looks so dark and threatening in the tube. Not a colour I could pull off. But then you swatch it and it is actually a very sheer jelly like pink with a strong fuchsia micro shimmer. Very wearable. Very glossy.


So those are the Lipglasses I picked up. Any favourites? Any I should have gotten but didn't?


That's it from me today.

Be awesome to each other.