Showing posts with label lipgloss. Show all posts
I don't know about you guys, but more often than not, I want a lip product that applied smoothly, applies a subtle pop of colour that enhances natural lip colour and is easy to top up during the day. Low maintenance, cheap and cheerful and of course, super cute. I don't think I'm asking too much.

I'm a little late to the party on this one, but I'm sure many of you have noticed by now that glossy lip crayons are taking over the makeup sections in your nearby stores. So many brands, so many colours. So where does one start? You swatch them ALLLLLLLLL! All over your arm. And then forget about the line of colours up your arm and walk out of the store. Then about half an hour later you look down and realise your white top has turned into some kind of abstract coloured masterpiece. A smear of hot pink here, coral there, apple red a little bit further over. Yep, that happened. More than once. Just call me Becasso.

So, what did I find during my extensive research other than soaking said top in vinegar is the only way to get the colour (mostly) out? That my favourite ones were not the expensive high end pencils, rather the cheaper Glossy Lip Crayon by Face of Australia.


 They all have similar wear time, slightly different textures and some have higher levels of pigmentation, I guess it really depends on what you are after personally. It's much of a muchness with these products, so don't feel like you have to splurge on a Clinique Chubby Stick when you can get one that works the same for $5. Yep. $5.

Raspberry Coulis, Jam Fancy and Apple Crumble
 The FOA ones all have super cute names, which I love. And make me hungry. The ones I picked out - Apple Crumble, Raspberry Coulis and Jam Fancy (please excuse me while I take a sec to wipe the drool of my keyboard) are all totally wearable and appropriately pigmented to make them a must have handbag item. They apply smoothly, feel very moisturising and don't tend to highlight and lip nasties like dryness or chapped lips. One thing I will mention is that these do have a vanilla scent, so that is something to keep in mind if you react to things like that, or just plain don't like it.

L to R - Raspberry Coulis, Jam Fancy, Apple Crumble
I've been giving these a workout in my kit lately, giving them as a present to the flower girls of bridal parties I've been working on. Anyone who knows me, knows that I don't agree with children wearing makeup beyond a bit of gloss, and I'll also lightly apply blush to flower girls so they don't feel left out. And can I just say how much the kids and their parents are appreciating the gift? It makes the kids feel grown up, and they then seen to mimic the lead of the grown ups behaviour wise. Pretty great deal for $5 I say. So if you are looking for a way to start introducing a teen to makeup, this definitely could be the way to go.  

These can be found at Priceline, Big W and Kmart for $4.99 each and the collection currently has 7 colours. 

So, who has tried these? Or a similar one? What are your thoughts? Love it or leave it?

Continuing on with Swatch-a-palooza, here is a glimpse into my pro kit. I have 25 OCC Lip Tars. I had more but they inevitably get stolen on shoots by models and assistants once they realise how awesome they are, the most recent casualty - my black one - Tarred. Very annoying.

I'm not saying you need all these colours, hell you only really need primary colours, a black and white and you can mix any shade you like. I just like having premixed colours so that I don't have to spend as much time mixing, since I can grab something close to the shade I'm after and just add a little to change it depending on my needs.

So lets jump straight into the pictures.

L-R - Feathered, Butch, Chlorophyll, NSFW
As you can see, Feathered is not opaque in comparison to the others and is prone to the mixture separating. I use it only in mixing colours so it's not an issue for me, but if you are looking for a solid white lip colour, this is not the one you are looking for.

Heads up - these stain. Particularly the red NSFW which great for your lips, not so much your arm. I maybe had this one for 3 mins max to get this level of stain.

Tone, Hush, Trick, Uber, Pennyroyal

Devine, Grandma, Kava Kava

Memento, Narcissus, Pretty Boy, Anime

Digitalis, Pageant, Demure, Katricia, Belladonna

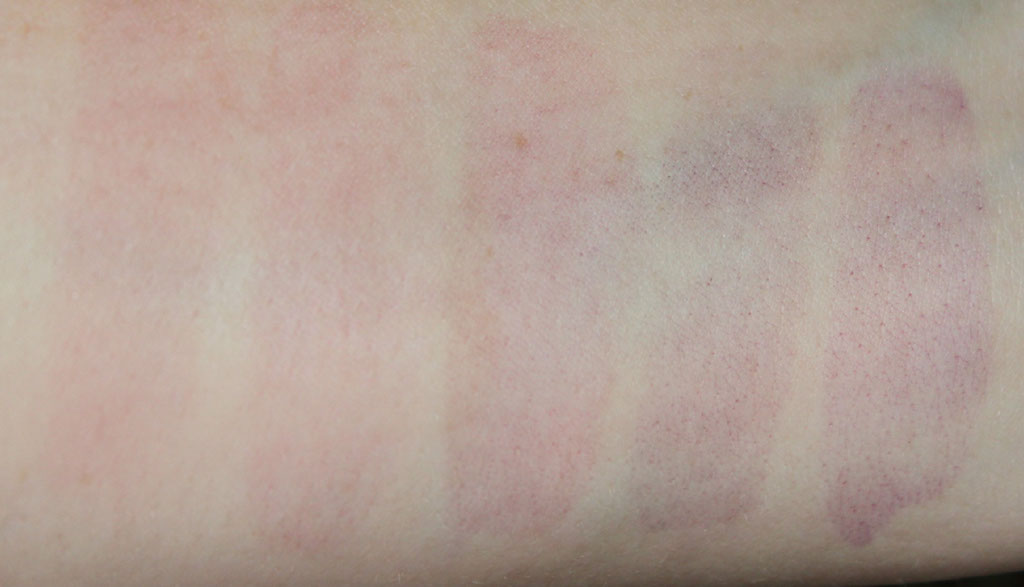
The purples also stain and quickly.

The new-ish metallic Lip Tars - Triptych, Electric Grandma, Super NSFW, Authentic. Love these!

One thing I find about OCC Lip Tars is that they can be incredibly drying on lips. I always prime with something really heavy duty like Paw Paw ointment and scrub the lips to remove any dead skin before applying these as they will emphasise dryness. I love that they dry to a matte finish and that once dry, they aren't going anywhere. The downside to this is that some of them stain pretty badly, namely the reds and purples.

A lip liner with these is an absolute must, as is being so careful that you don't use too much. I know some people think I'm exaggerating when I say that I use a pinhead sized drop of product for the whole lip area. I'm not. If you use anymore then that, the product will run and feather and will be a nasty mess. I've found that the people who dislike using Lip Tars and claim they can't see what the fuss is about are the ones who use a little too much.

This is a superb product but one you have to know how to use properly to achieve an amazing look. You need to have prepared your lips, exfoliated, primed and lined, before application.

These are phenomenal value for money at $18 each here and cheaper in the US. These will last a really long time and you can't fault the colour payoff, as you can see above.

My one gripe is that the packaging has a tendency to randomly explode leaving you will a sticky, highly pigmented mess to clean up. Luckily this has never happened to me (touch wood) but I have plenty of makeup artist friends who have lost a tube or two to a colour explosion in their kit. It's a devastating thing. I never leave mine in my main kit for that reason, only packing them when I know I need them. And always in a separate snap lock bag - just in case.

Do you have Lip Tars? Do you love them? Any tips you want to share?

The reason you read a blog by a makeup artist is because you want the tips and tricks right? Well, here you go...

You want to know what the big secret to an amazing pout is? Lip prep and care. Do you really think that lips like, oh I don't know, Rosie Huntington Whiteley's, don't take constant work? Not hard work mind you, but constantly exfoliating and using a moisturising balm.
I love Lucas Pawpaw Ointment. Not only is it an amazing product that is used by makeup artists and consumers worldwide, it was created and continues to be made a few suburbs away from where I live here in Brisbane which makes it a true local success story. I use this on shoots and for weddings when I come across a client with extremely dry and flakey lips. You can also easily do this at home. I apply it liberally before I do anything else so it has time to work it's magic. It's thick, very thick. I also always carry soft disposable toothbrushes in my kit, however a clean mascara wand will also do in a pinch. Once I've let the lips soften (usually around half an hour), I will wipe the ointment off and gently scrub the flakey bits of skin away. Ta-da! Baby soft lips.

I also love Rosebud Perfume Co's Smith's Rosebud Salve. This is my holy grail lip product. I use it on myself, I am known for carrying around additional tubes and tins and giving them away to people to convert them. It's an amazing, magic product. It's also not that easy to get a hold of here in Australia unless you want to pay $30 a tin. Unless you have connections like I do. Want to know where I buy mine? Right here. Want the tube? Try this one instead. And for $10! Bargain.


So what comes after lip prep? Liner. Looks great under lipstick or just a gloss, it adds a touch of colour to your lip and adds to the longevity of your lip product. Another thing that I love about liners is that you have have one lipstick and 4 different coloured liners - layer those bad boys and it's like having 4 more shades which is super helpful where you find that elusive PERFECT lipstick shade! It means that it might be a medium plum colour but layered over a deeper red liner, you've added depth to the colour and created the perfect nighttime vampy colour. Want to make that same colour work appropriate? Pair it with a nude liner or a light pink. Want to make it bright? Try it over a hot pink. Experiment! That's the exciting part of makeup - it washes off, so you can go nuts!

Another liner tip I have is a method that I find works really well for me. When I first started to use liner I would painstakingly try to colour in the whole lip. Not anymore. I line the lips (fairly roughly unless it's a red or hot pink because then it's noticeable), colour in the middle section then use my ring finger to blend out the colour. You get even distribution, and the heat from your finger softens the wax in the liner and makes it easier to move around. You don't get strong, harsh lip lines either which I find can often really harden an overall makeup look. Have a cotton tip dipped in remover on standby for any times you get a little too enthusiastic and go outside the lip line, but accuracy will come with practice.


Then apply your lip colour of choice. You may like to apply it from the tube, you may like to use a brush. Sometimes I use my fingers to pat it on. Don't worry, I use HEAPS of hand sanitiser while I'm working! Always have that cotton tip dipped in remover nearby to remove any excess product. Don't stress if you lips look uneven. Every ones lips actually are uneven. You just need to play until you learn what corrective method works better for you.

So there you have it, my tips and tricks to the perfect pout. I'm sure there's more and I'll add them as I think of them. Do you guys have any to share?

That's it from me today. I'm so excited to share some new products with you from one of my favourite stores over the next few weeks. It took all my restraint to not stick my brushes straight into the eye shadows before I photographed them!

Be awesome to each other.